The front of an HP A3550A "Nike"
Model 20Array
after configuration and testing on a pair of old rackmount rails.
The back of an HP A3550A "Nike"
Array
in the same position.
Close-Up shot of this array's
Fast and Wide SCSI Ports.
This was hooked up to the
back of an HP3000 957
during test and configuration.
A
frontal view of the HP3000 957
used for configuration and test.
The test HP3000 957
Console.
During testing, an old
Inkjet
to run MAPPER came in handy to see the paths of tested Install.
Now we switch to a view of the
HP3000 959KS
where the Model 20 will be installed.
This is a close up of the
Old Model 10
Nike Array that this will replace.
Of course a fully loaded Nike Model 20 is fairly heavy,
so we got a
Hand Truck
from our company's receiving department.
And here it
goes to
the computer room from our HP3000 957 test bed.
However, getting to the computer room was not
enough. Since it was a heavy lift, we also
used a
Hand Forklift
to get it to waist height so it will just slide
into the rackmount.
Then we started
removing facades
to get it in the equipment rack.
Because the Model 20 is larger than a Model 10,
we had to shift our
DDS Drives
in the old 6000 enclosure to
another rack
in order to make room for the Model 20.
After we shifted the DDS drives to one side,
we start removing the Model 10, starting with
the Faceplate.
Here it is
without the faceplate.
(Not shown: Removing Torx screws on the rackmount.)
Then it just
slides out.
Note: Since a Model 10 is not as heavy as a Model 20
and it was not fully loaded, we did not need the
forklift. But it was still a two person carry.
Here is a
nice empty space
that the Model 20 will go in. (Not shown: Lowering
the rail mount because the Model 20 is taller.
Here is the Model 20
on the forklift.
When it was lowered, it was just an easy matter to
slide it from the hand truck to the forklift.
After some "fine" adjusting of the heighth using
the forklift, here it is
going into the rackmount.
All is not perfect, after the Model 20 has been
placed in the equipment rack, we noticed the
front mounting clips were not lowered to the
proper holes in the rack. Without sliding the
Model 20 Array back out, here I am
forcing the clips down
using a Swiss Army knife and a screwdriver.
Here it is in the rack.
Here it is in the rack
close up.
Once we have the array fired up and hooked
up to the Fast and Wide SCSI port on the
HP3000, we get the
proper serial cable and hook to to the back
of an HP700/96 terminal. Change the
"terminal config" to emulate at VT100
(a.k.a. EM100).
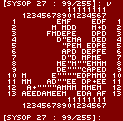
This screen
is the Presentation Utility for the Array.
From here you can bind your Mirrored (Raid-1)
Drives and your Raid-1/0 drives. This
screen shows drives 1-2 3-4 5-6 7-8 9-10
mirrored as Raid-1 and drives 11-14 15-18
configured as Raid-1/0. Drives 19 and 20
were set up as "Hot Spares". (Hot spares
rebuild automatically when a single drive
in the array fails.
Here is the
Inkjet
again. This is soooo convenient, since the
only time you can print a MAPPER listing is
when the system is down. So you have to
use the old "Log Bottom" feature when it
is attached to a the Console.
Here it is
INSTALLED.
Of course what I mean is RE-Installed.
Because it replaced LDEV 1 on the
MPEXL_SYSTEM_VOLUME_SET, we had to
do an INSTALL from our CSLT. Once
that was done, all we had to do was
modify our IO in SYSGEN to the new
paths and reboot.
Our data is on other Volume_Sets so
the RELOAD time was kept to a minimum.
Here is our
Old Model 10
resting on the floor of our two other HP3000
Model 957s. Hmmmmm what should I do?
One 957 emulates our production box to test
our Quiz code,
the other 957 is
THIS machine that this
web page is on and runs the Empire game.
Should I add the old Model 10 to one of
these 957s?
If so, which one?


